Prevent Hackers from Posting Malicious Links in Your Web Applications

Photo by @ scottwebb on Unsplash
Mitigating web vulnerabilities and ensuring high security is the topmost priority of a web developer. When deploying a website for a new business or a SaaS application, we need to ensure that our system is not vulnerable to any potential risks.
The number 1 rule while working on web security is never to trust the users. Sometimes hackers post malicious links to the website to hack the users who click the links. Sometimes the hackers post phishing links to get unauthorized access to the users’ sensitive information. As web developers, it is our primary responsibility not to allow the users to post malicious links in our web application.
In this article, we will be discussing how we can detect malicious links in our web applications. We will be using Google Safe Browser API to detect malicious links. So without a further-a-do, let’s get started!
What Is Google Safe Browsing?
According to the Google Developers documentation,
Safe Browsing is a Google service that lets client applications check URLs against Google’s constantly updated lists of unsafe web resources. Examples of unsafe web resources are social engineering sites (phishing and deceptive sites) and sites that host malware or unwanted software.
To keep things simple, Google keeps a record of unsafe web resources, and when we search a particular link, google searches the link against this record. By using the Google Safe Browsing API, we can detect the threat type, target platform, and all other necessary information.
Let’s Get into The Implementation
Let’s create a simple HTML website to input the links and tell the users whether it is a malicious link. If the link the user entered is malicious, we will describe the user the type of threat and the target platform. We will be using JQuery for better convenience.
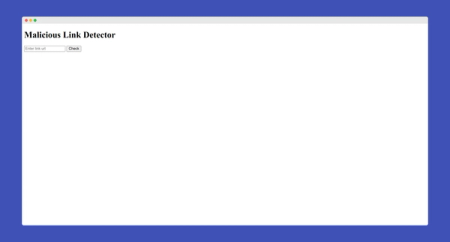
<!DOCTYPE html>
<html lang="en">
<head>
  <meta charset="UTF-8">
  <meta http-equiv="X-UA-Compatible" content="IE=edge">
  <meta name="viewport" content="width=device-width, initial-scale=1.0">
  <title>Malicious Link Detector</title>
  <style>
    .red-text {
      color: red;
      display: none;
    }
    .green-text {
      color: green;
      display: none;
    }
    .details {
      display: none;
    }
  </style>
</head>
<body>
  <h1>Malicious Link Detector</h1>
  <div>
    <input type="url" name="url" id="url-input" placeholder="Enter link url" />
    <button type="submit" id="submit-btn">Check</button>
  </div>
  <div>
    <h3 class="red-text">Link is malicious</h3>
    <div class="details">
      <p>Threat Type: <span class="threatType"></span></p>
      <p>Target Platform: <span class="targetPlatform"></span></p>
    </div>
    <h3 class="green-text">Link is not malicious</h3>
  </div>
  <script src="https://code.jquery.com/jquery-3.6.0.min.js"></script>
  <script>
    $('document').ready(function () {
      $('#submit-btn').click(function () {
        const url = $('#url-input').val()
        console.log(url)
      })
    })
  </script>
</body>
</html>
Here, we have created a basic HTML web script where the users will input the link and determine whether the link they entered is malicious or not.
Now, we need to detect whether the link is safe or malicious. For this, we need to call the Google Safe Browsing API.
Getting An API Key
To call the Google Safe Browsing API, we first need to have an API key. To get an API key is actually simple.
First, go to the Google Developers Console. Log in with your Google Account, and then create a new project, if you don’t have any. Then go to the API & Services > Library from the left panel, and search for “Safe Browsing API” to activate the Safe Browsing API. After getting the Safe Browsing API from the search result, click on it and you should get an “Enable” button. Click on that “Enable” button to activate the Safe Browsing API.
Next, click on the API & Services > Credentials from the left panel, and click on the “Create Credentials”. Select “API key” from the dropdown and copy the API key, and store it somewhere safe.
Calling The API
Now, as we have got the API key, it’s time for calling the API. Let’s change the HTML code like the following code to call the API to detect malicious links.
<!DOCTYPE html>
<html lang="en">
<head>
  <meta charset="UTF-8">
  <meta http-equiv="X-UA-Compatible" content="IE=edge">
  <meta name="viewport" content="width=device-width, initial-scale=1.0">
  <title>Malicious Link Detector</title>
  <style>
    .red-text {
      color: red;
      display: none;
    }
    .green-text {
      color: green;
      display: none;
    }
    .details {
      display: none;
    }
  </style>
</head>
<body>
  <h1>Malicious Link Detector</h1>
  <div>
    <input type="url" name="url" id="url-input" placeholder="Enter link url" />
    <button type="submit" id="submit-btn">Check</button>
  </div>
  <div>
    <h3 class="red-text">Link is malicious</h3>
    <div class="details">
      <p>Threat Type: <span class="threatType"></span></p>
      <p>Target Platform: <span class="targetPlatform"></span></p>
    </div>
    <h3 class="green-text">Link is not malicious</h3>
  </div>
  <script src="https://code.jquery.com/jquery-3.6.0.min.js"></script>
  <script>
    $('document').ready(function () {
      $('#submit-btn').click(function () {
        const url = $('#url-input').val()

        // Payload we will be passing in the API
        const payload = {
            client: {
              clientId: 'malicious-links-detector', // Can be any name
              clientVersion: '1.0.0', // Can be any version
            },
            threatInfo: {
              threatTypes: [
                'MALWARE',
                'SOCIAL_ENGINEERING',
                'UNWANTED_SOFTWARE',
                'POTENTIALLY_HARMFUL_APPLICATION',
                'THREAT_TYPE_UNSPECIFIED',
              ], // These are the possible threat types we are looking for
              platformTypes: ['ANY_PLATFORM'], // We will detect links targeting any platforms
              threatEntryTypes: ['URL'], // The threat entry type is URL
              threatEntries: [{ url: url }], // We can pass multiple urls if we want
            },
          }

        // Calling the Safe Browsing API
        // Replace the {key} with your Googe API Key
        $.ajax({
          url: 'https://safebrowsing.googleapis.com/v4/threatMatches:find?key={key}',
          type: 'post',
          data: JSON.stringify(payload),
          contentType: 'application/json',
          dataType: 'json',
          success: function(data) {
            // If threat found
            if (data.matches) {
              $('.green-text').hide()
              $('.red-text').show()
              $('.details').show()
              $('.threatType').text(data.matches[0].threatType)
              $('.targetPlatform').text(data.matches[0].platformType)
            } else {
              $('.green-text').show()
              $('.red-text').hide()
              $('.details').hide()
            }
          },
          error: function (err) {
            console.log(err)
          }
        })
      })
    })
  </script>
</body>
</html>
If we test this code in the browser, we can see the results for both malicious and genuine links.
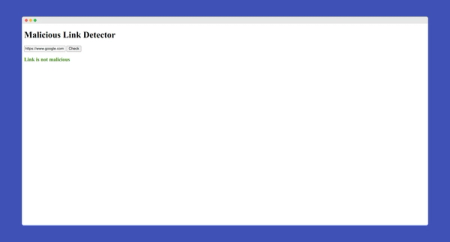
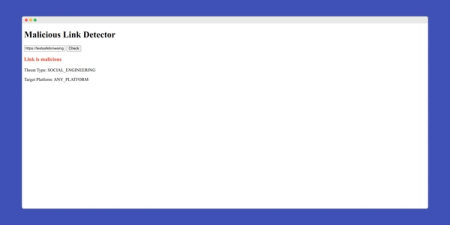
Pretty impressive right!
You can find a list of malicious links on the Safe Browsing Testing Links website. You can test with other malicious links if you want. Hopefully, it can detect most of the malicious links currently available on the internet.
Conclusion
We now will be able to detect malicious links on our website and prevent our users from clicking them.
Although Google Safe Browsing API is for non-commercial use only, we can use the Google Web Risk API for commercial purposes.
If you like my article, here is another article about the ultimate way to store authentication tokens in JavaScript. The Ultimate Way to Store Authentication Tokens in JavaScript Handle authentication like a projavascript.plainenglish.io
Have a nice day!